

QUICK FACTS
- SSO setup is self-serve. Anyone can complete it and pass the values to their IT team.
- You set up SSO in the configuration portal, which takes you outside Profound.
- Exit the setup and come back anytime. The values you entered or generated stay in place, and your team keeps signing in as usual until you enable SSO in the last step of the setup guide.
- Profound doesn’t publish fixed SSO connection values such as the ACS URL, Entity ID, or Redirect URI, and you don’t need to request them. The portal generates them for your organization as you follow the setup steps.
Before you start
You’ll need:- The Admin role in your Profound organization
- Administrative access to your IdP
- The domain you want to enable for SSO
- An account in your IdP on the SSO domain, for running the test sign-in
- Access to your DNS records to verify domain ownership
Setup steps
1
Open the SSO configuration portal
- In Profound, select your organization name at the top left of the screen, then select Settings.
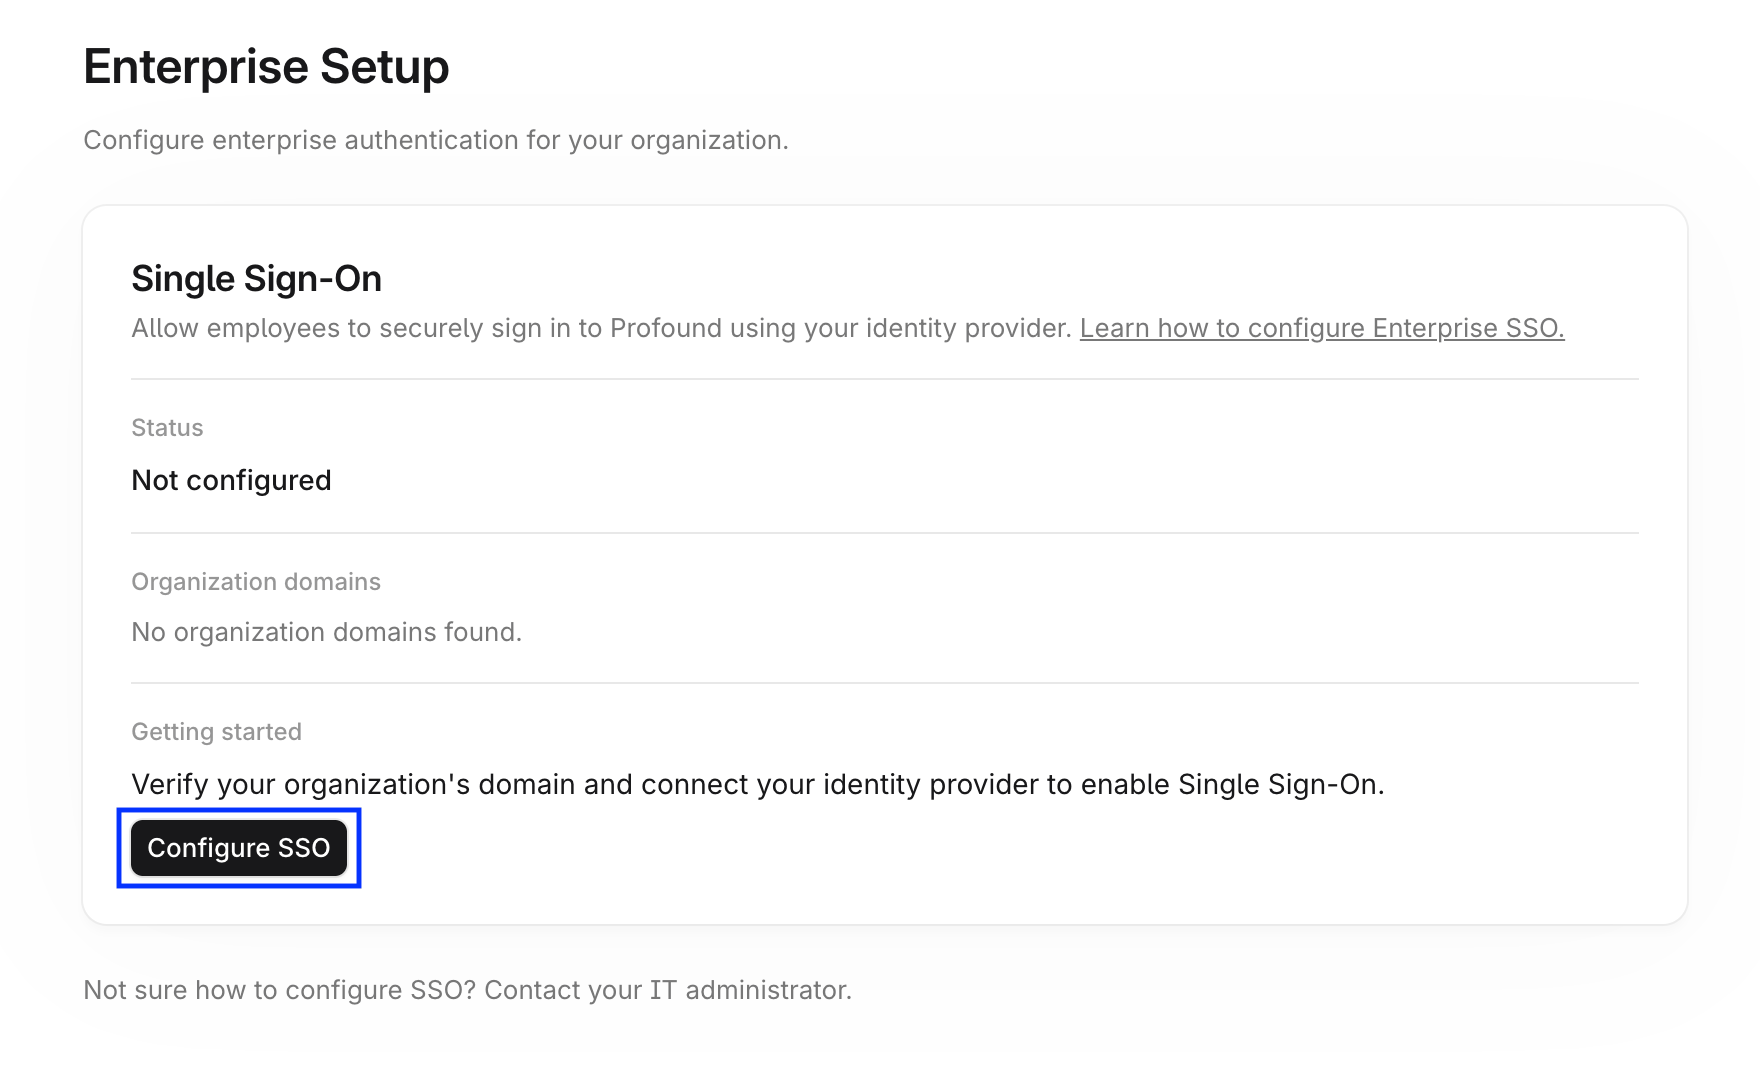
- Select Enterprise Setup under Organization in the left navigation sidebar. The Single Sign-On card shows your current SSO status and verified domains.
-
Select Configure SSO to open the configuration portal.
2
Verify your domain
The portal takes you to the domain verification step. Follow it as described in Domain verification guide. The remaining steps become available after the domain is verified.Profound checks the email domain of each user who signs in through your IdP against your verified domains, and rejects the sign-in when it doesn’t match or when your organization has no verified domains.After your domain is verified, the Single Sign-On card shows the status In progress until you enable SSO.
This step is for adding a DNS record, not for connecting your IdP. You select your IdP, such as Okta or Microsoft Entra ID, in the next step.
3
Select your identity provider
Select your IdP from the list of supported options. After you select it, the portal shows setup instructions specific to your provider.If your provider isn’t on the list, use the custom SAML or OIDC connection option. If you run your own authorization server rather than a commercial IdP, use the custom OIDC connection option.
4
Follow the IdP-specific instructions
The portal walks you through connecting your IdP to Profound. It shows the values to copy from Profound into your IdP, and the values to retrieve from your IdP and enter into the portal. Copy the Profound values from the portal. They’re generated per SSO connection and don’t appear anywhere else in Profound.The values you exchange depend on your SSO protocol:Follow the instructions shown in the portal for your specific IdP and protocol.
- OIDC
- SAML
- Profound → IdP: the Authorized Redirect URI
- IdP → Profound: the Discovery Endpoint, Client ID, and Client Secret
5
Test the connection
The final step in the portal validates your connection. Select Test sign-in to run a real sign-in through your IdP. The portal redirects you to your IdP, you sign in with an account on the domain you verified, and your IdP returns you to the portal with the result:
- Test successful: your IdP returned a valid response and the connection is configured correctly.
- Test failed: the portal shows the validation error and debugging steps. Repeat Step 4 to correct the connection values, then run the test again.
- Testing happens in your own Profound organization, a separate test organization isn’t needed.
- Running a test sign-in only affects the account you test with.
- Your team keeps signing in as usual until you enable SSO in the next step.
6
Enable SSO
After the test passes, enable SSO for your domain directly from the portal. Back on the Enterprise Setup page, the status reads SSO Enabled and your domain is marked Verified. Select Check status to refresh.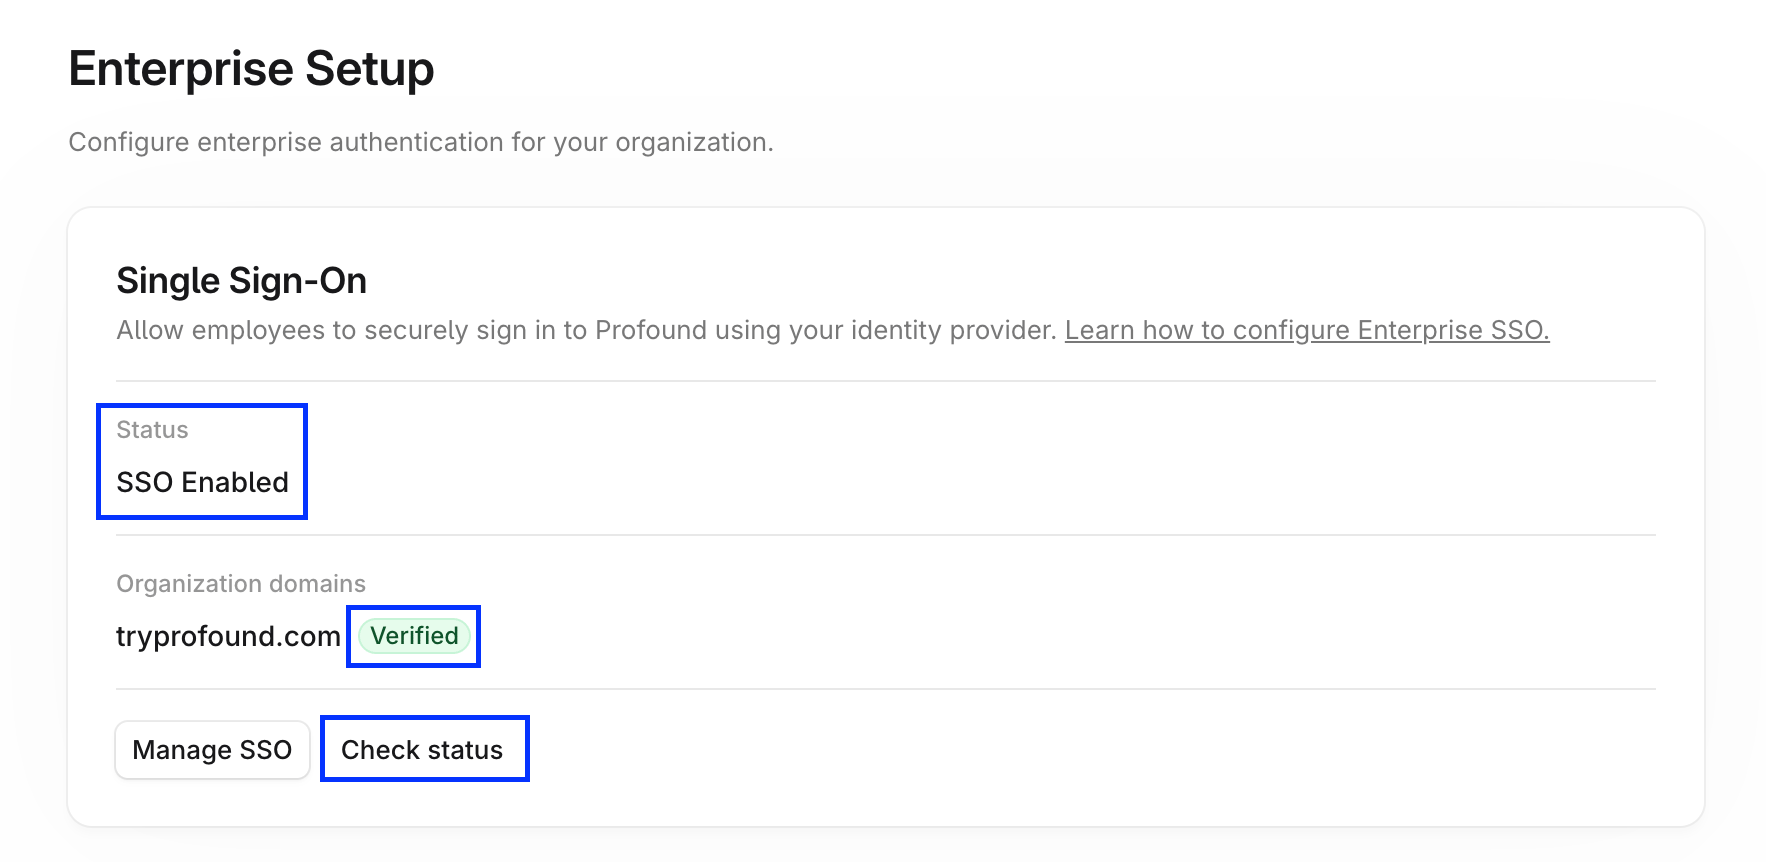
Notes
- Each Profound organization needs its own SSO connection.
- Subdomains can’t use the same SSO connection as the root domain: each subdomain needs its own connection.
- Keep each domain’s verification TXT record in place for as long as SSO is enabled for that domain.
- For SAML connections, renew your IdP signing certificate before it expires. The Single Sign-On card shows a warning as the expiry date approaches.
- Contact customer support if you need help during setup.